Make Art at Home: Clay Roses
Normally, the Arts in Medicine staff would teach this to patients at bedside, so for those caregiving at home, this is a great option!

UF Health Jacksonville Arts in Medicine program coordinator Lauren Anter walks us through another at-home art project. Mashing clay in your hands can be a very relaxing activity and has similar effects as using a stress ball. Normally, the Arts in Medicine staff would teach this to patients at bedside, so for those caregiving at home, this is a great option! It may also be fun to include this in the last few weeks of summer with your children before school begins, or to try on your own.
To get started on this simple but elegant project, you need three materials: air-dry clay, acrylic paint colors (of your choice) and a few paint brushes in various sizes. Materials are easily available online from various retailers for delivery, pick-up, or in-store. Let’s jump right in!
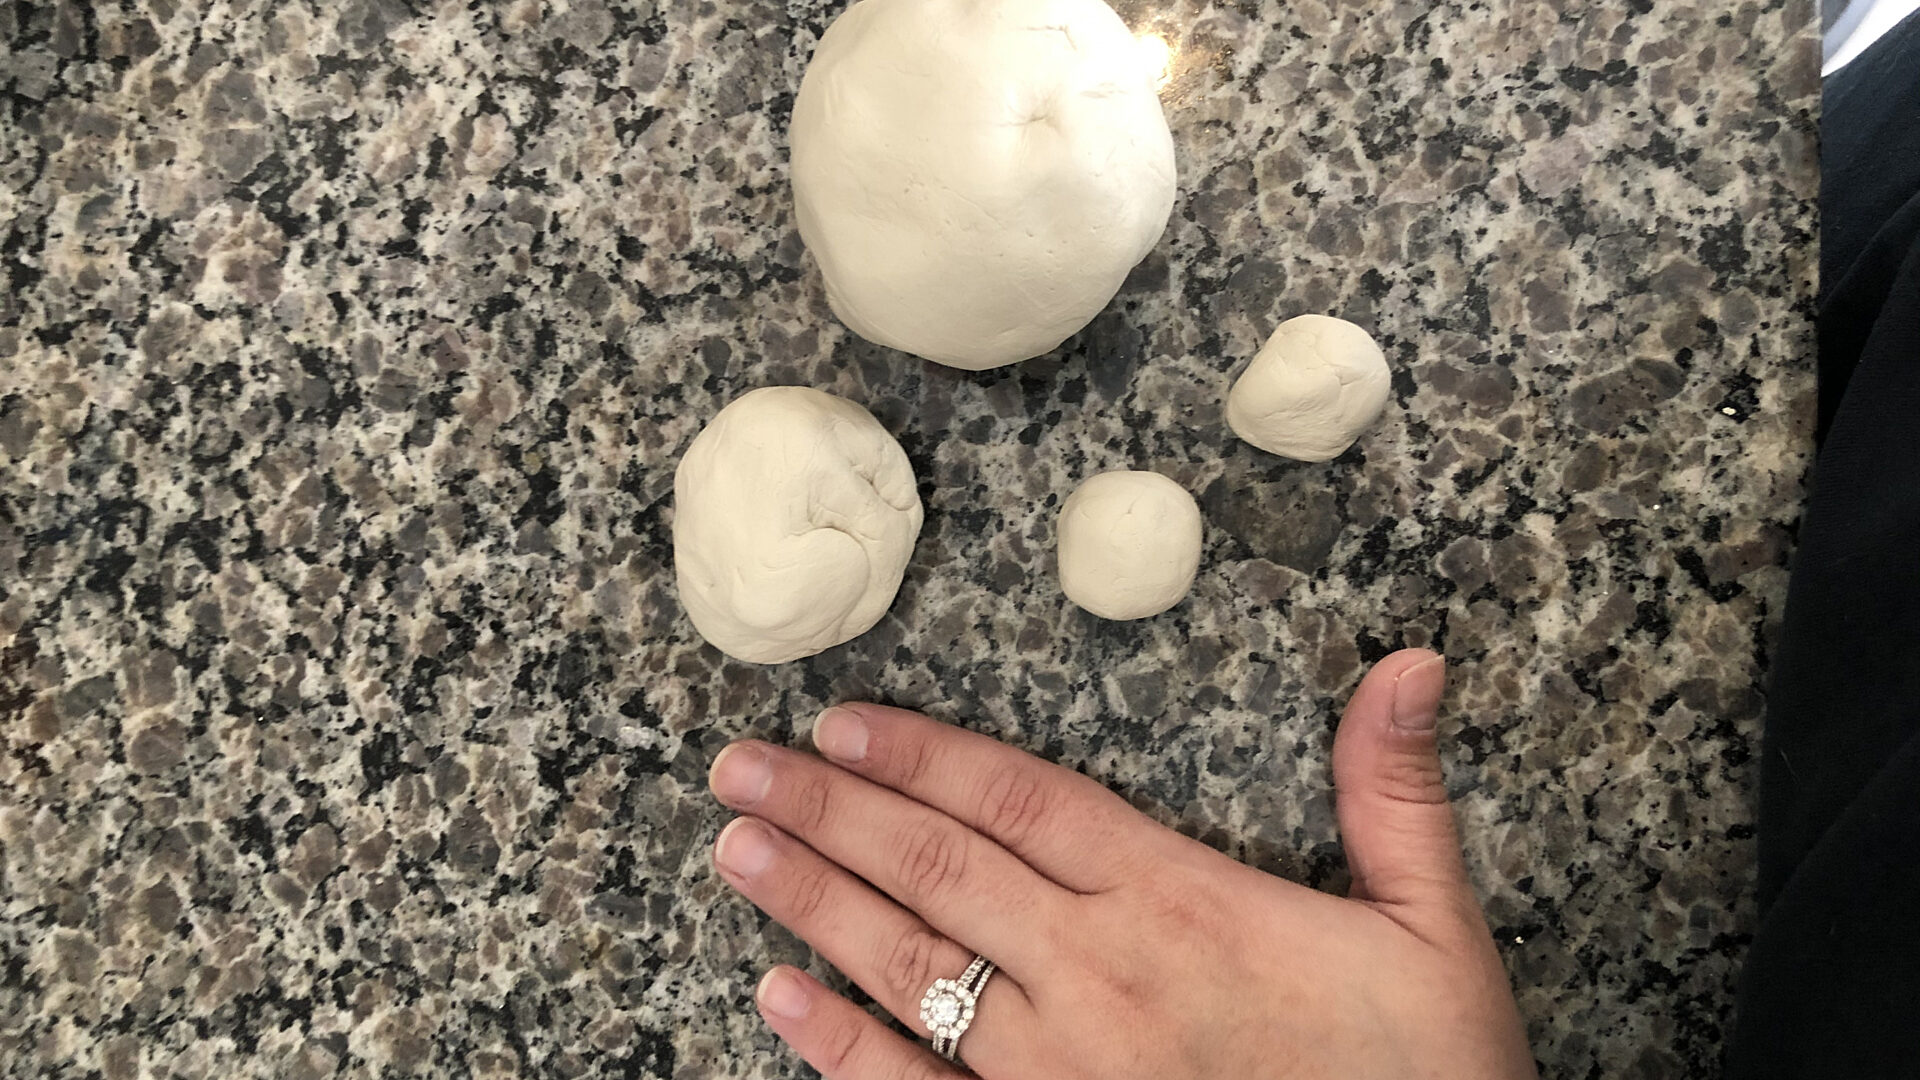
Step one: Grab a wad of clay. Lauren’s steps depict roses in four sizes. You can make them as big or as small as you like. Lauren recommends starting large while you are practicing! Her hand is shown for size context.
Step two: Take each clay ball and break it up into five to seven even-sized pieces.
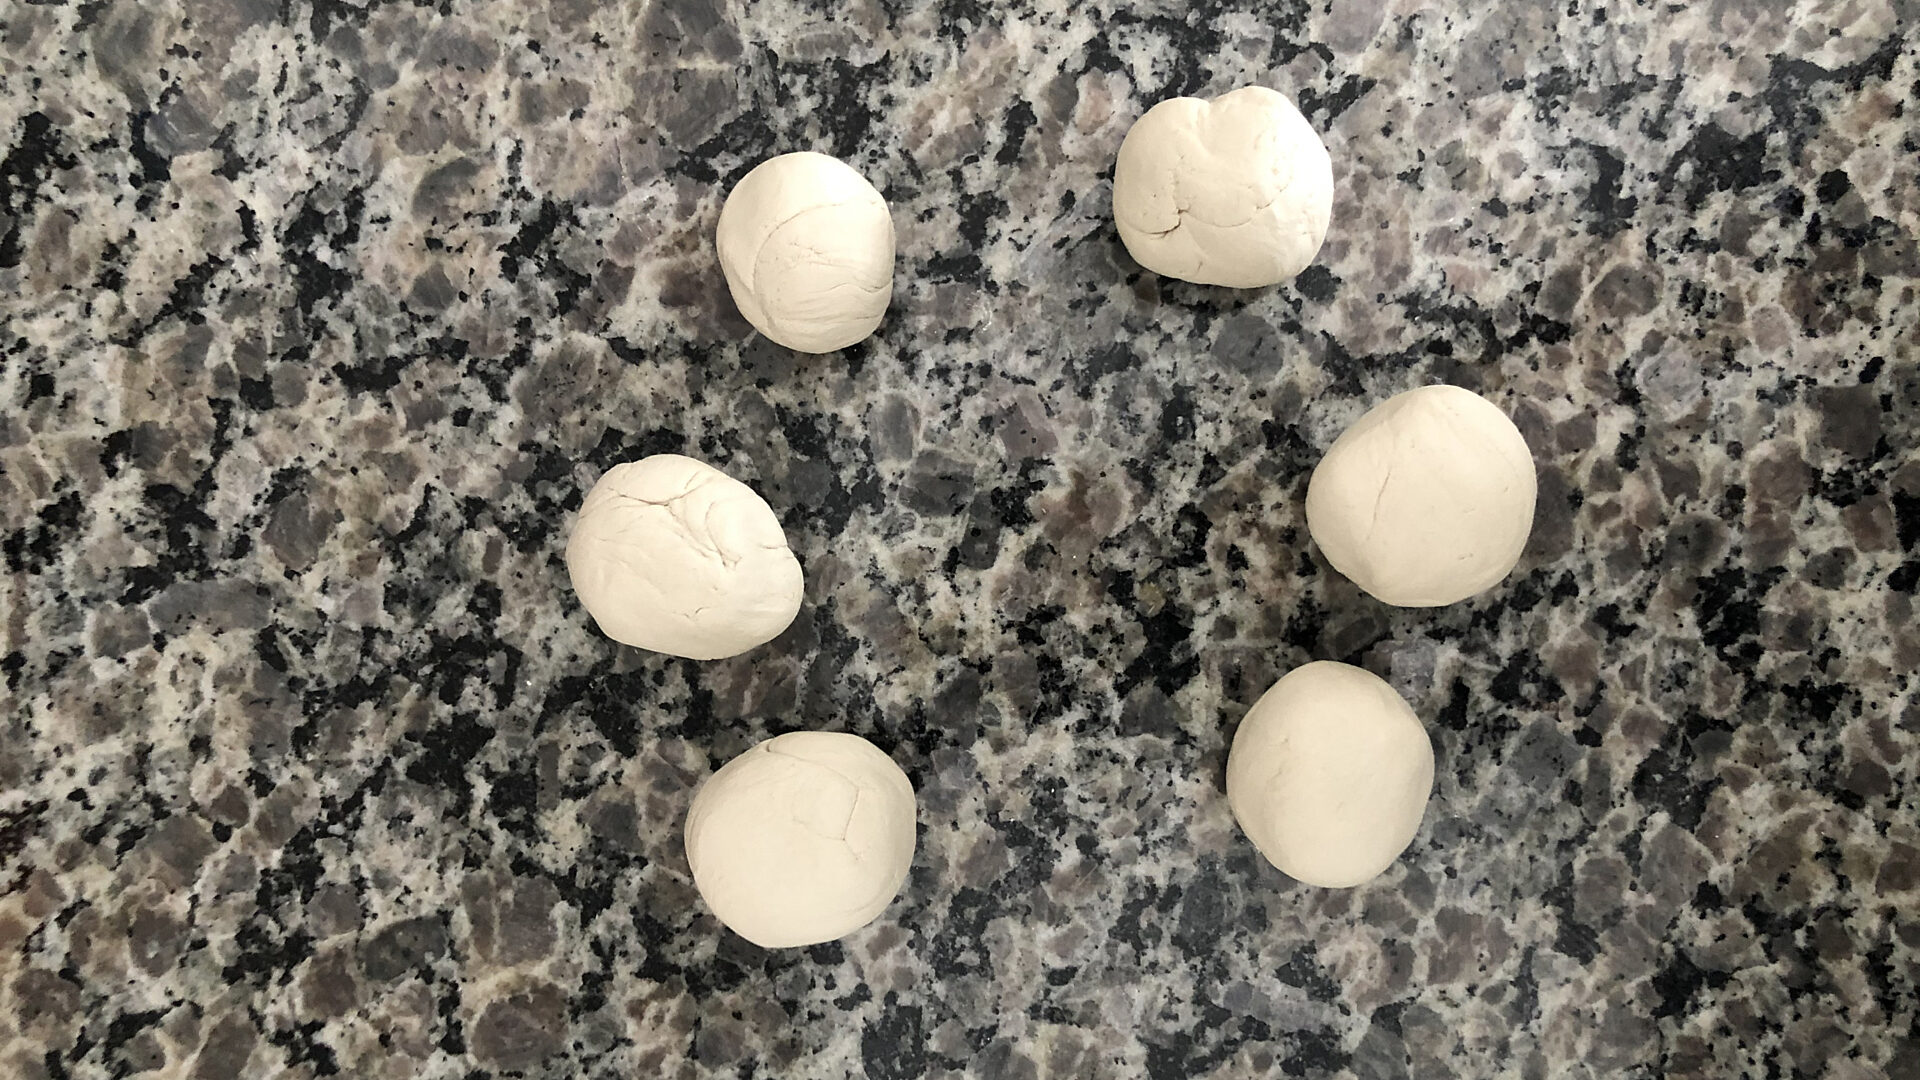
Step three: Take each of those pieces and roll them into balls.
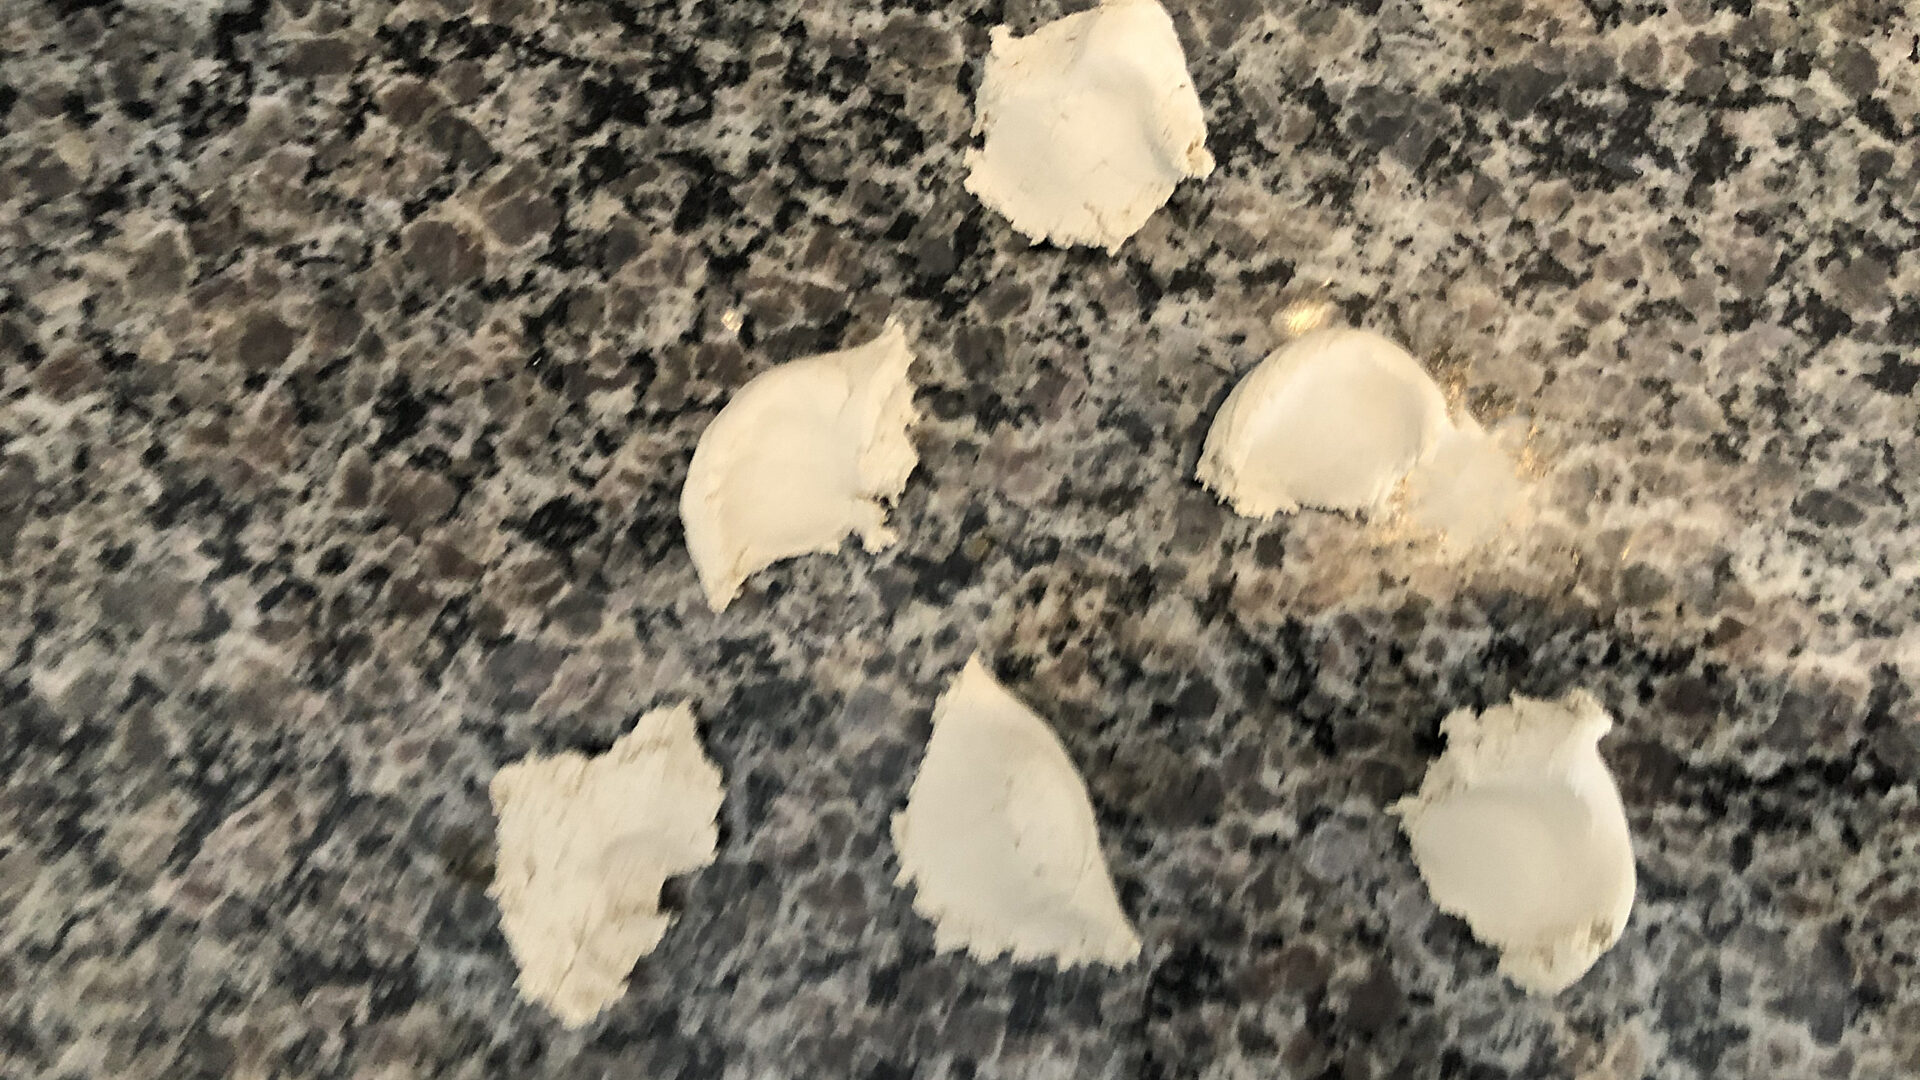
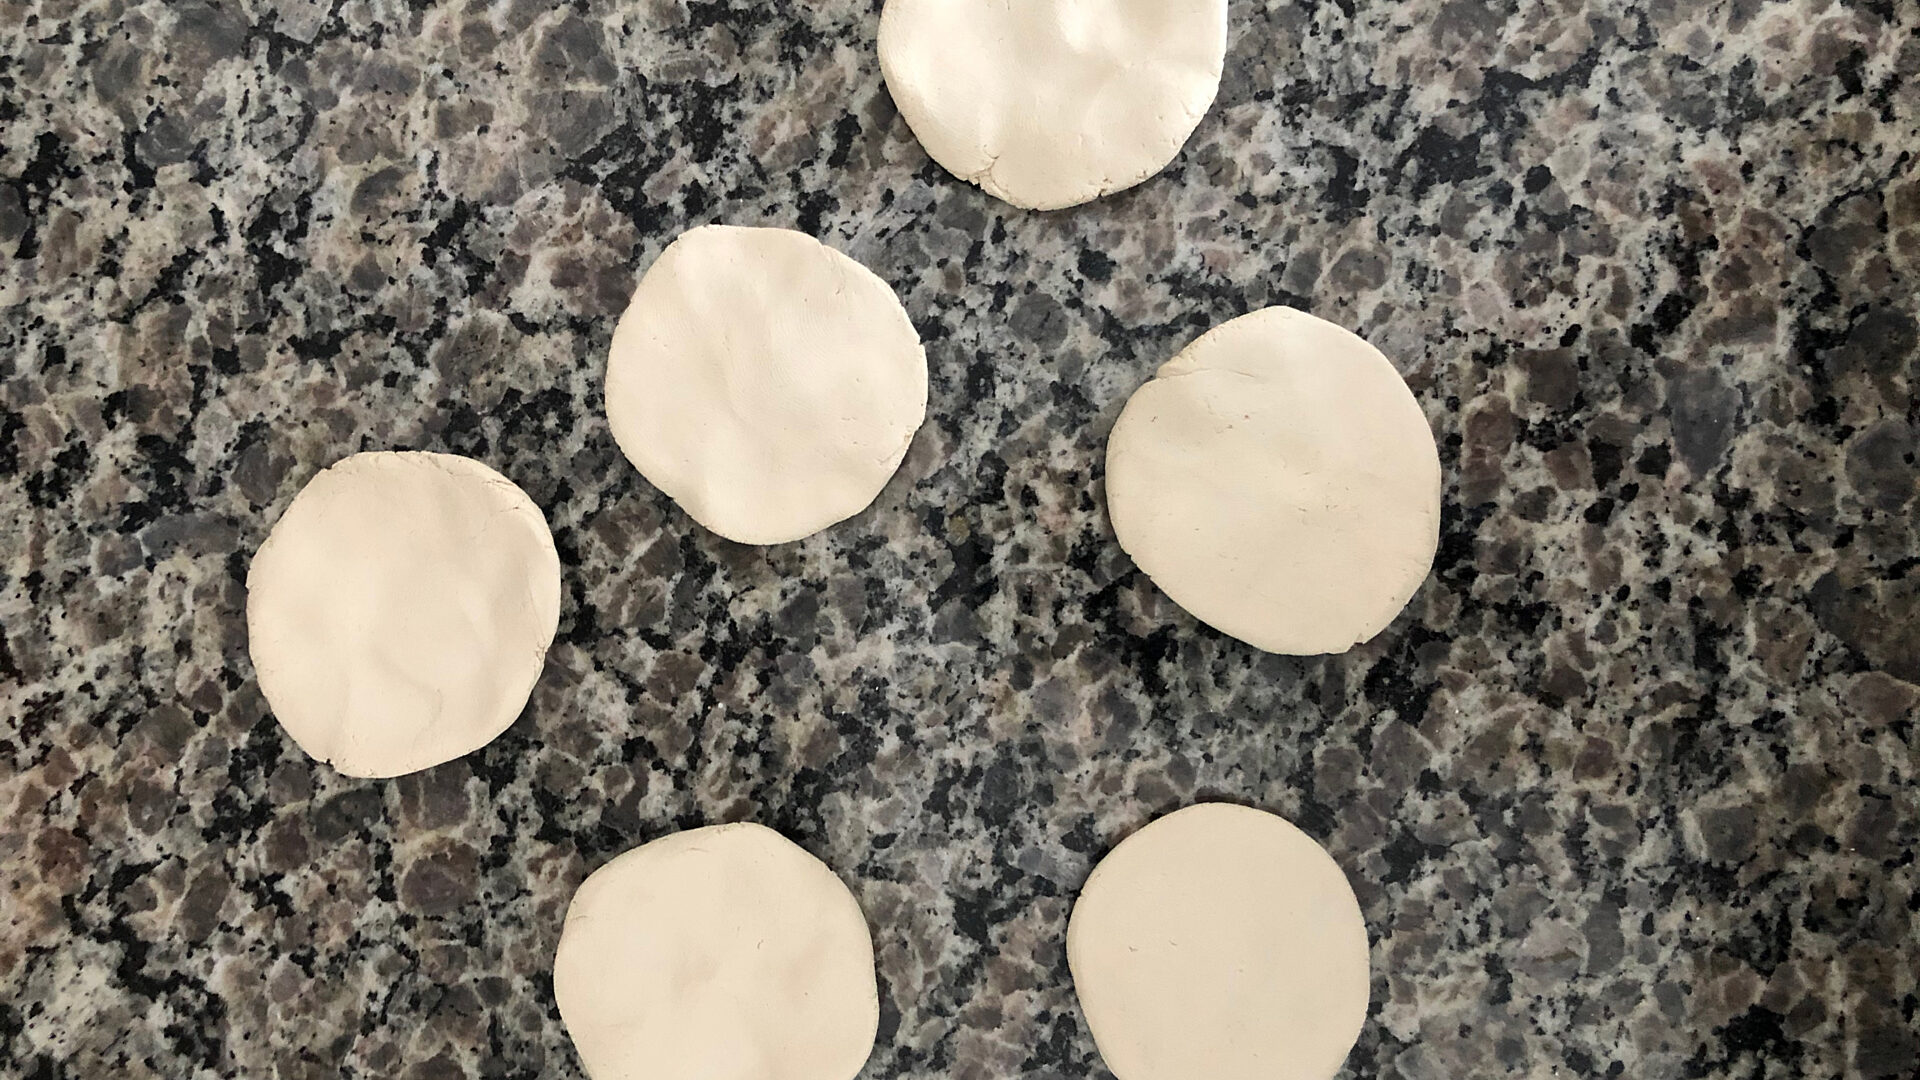
Step four: After you’ve rolled them into balls, you want to press them down into little pancakes. See the first photo below that shows the ideal thickness of the clay at this step.
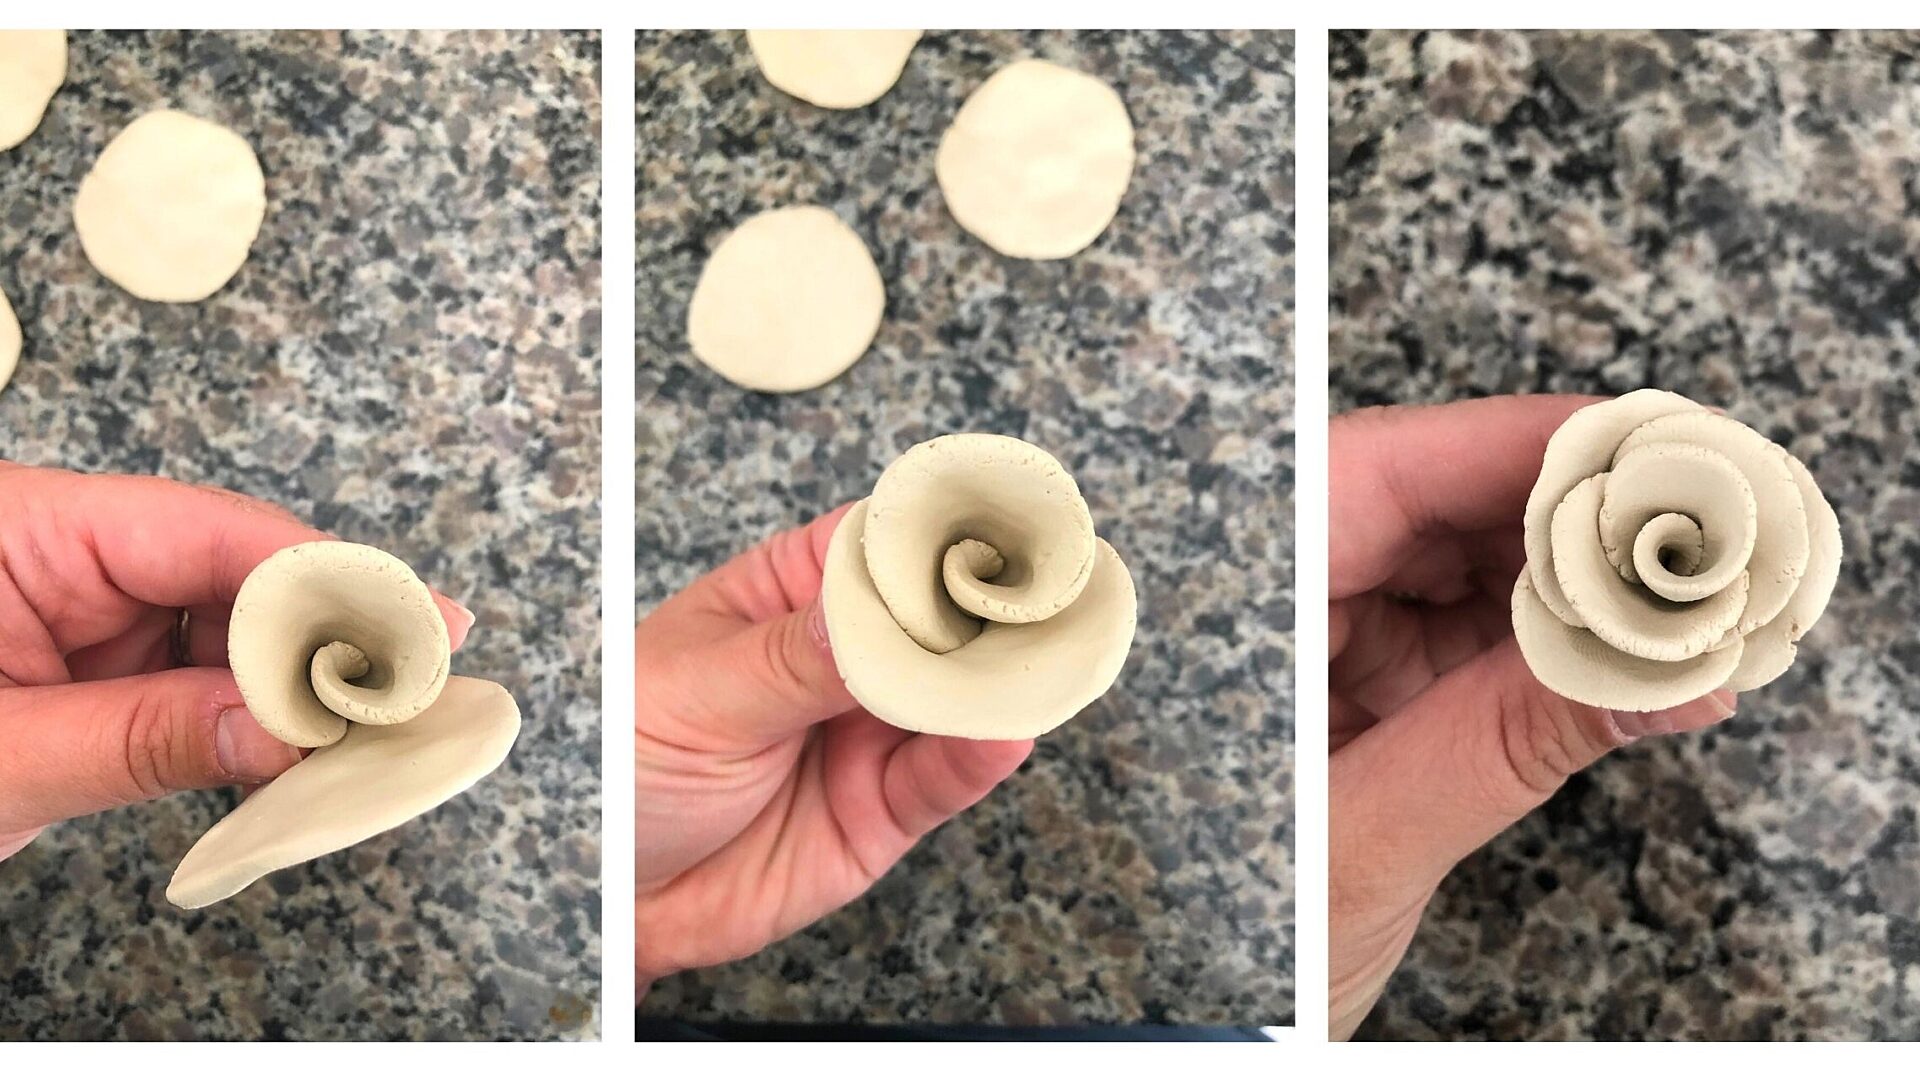
Step five: After you have all of your petals, make the center of the rose by picking up one of your flat petal pieces and rolling it gently. You can place your thumb in the center to help guide you.
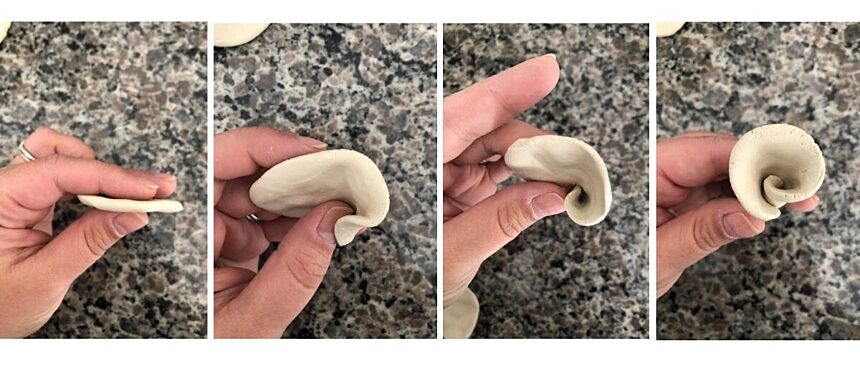
Step six: Once you’ve finished this step, it should start to look like a rose! Next, take your remaining flattened petal pieces and start placing them around the center piece. Keep adding petal pieces until you are satisfied with the size of your rose.
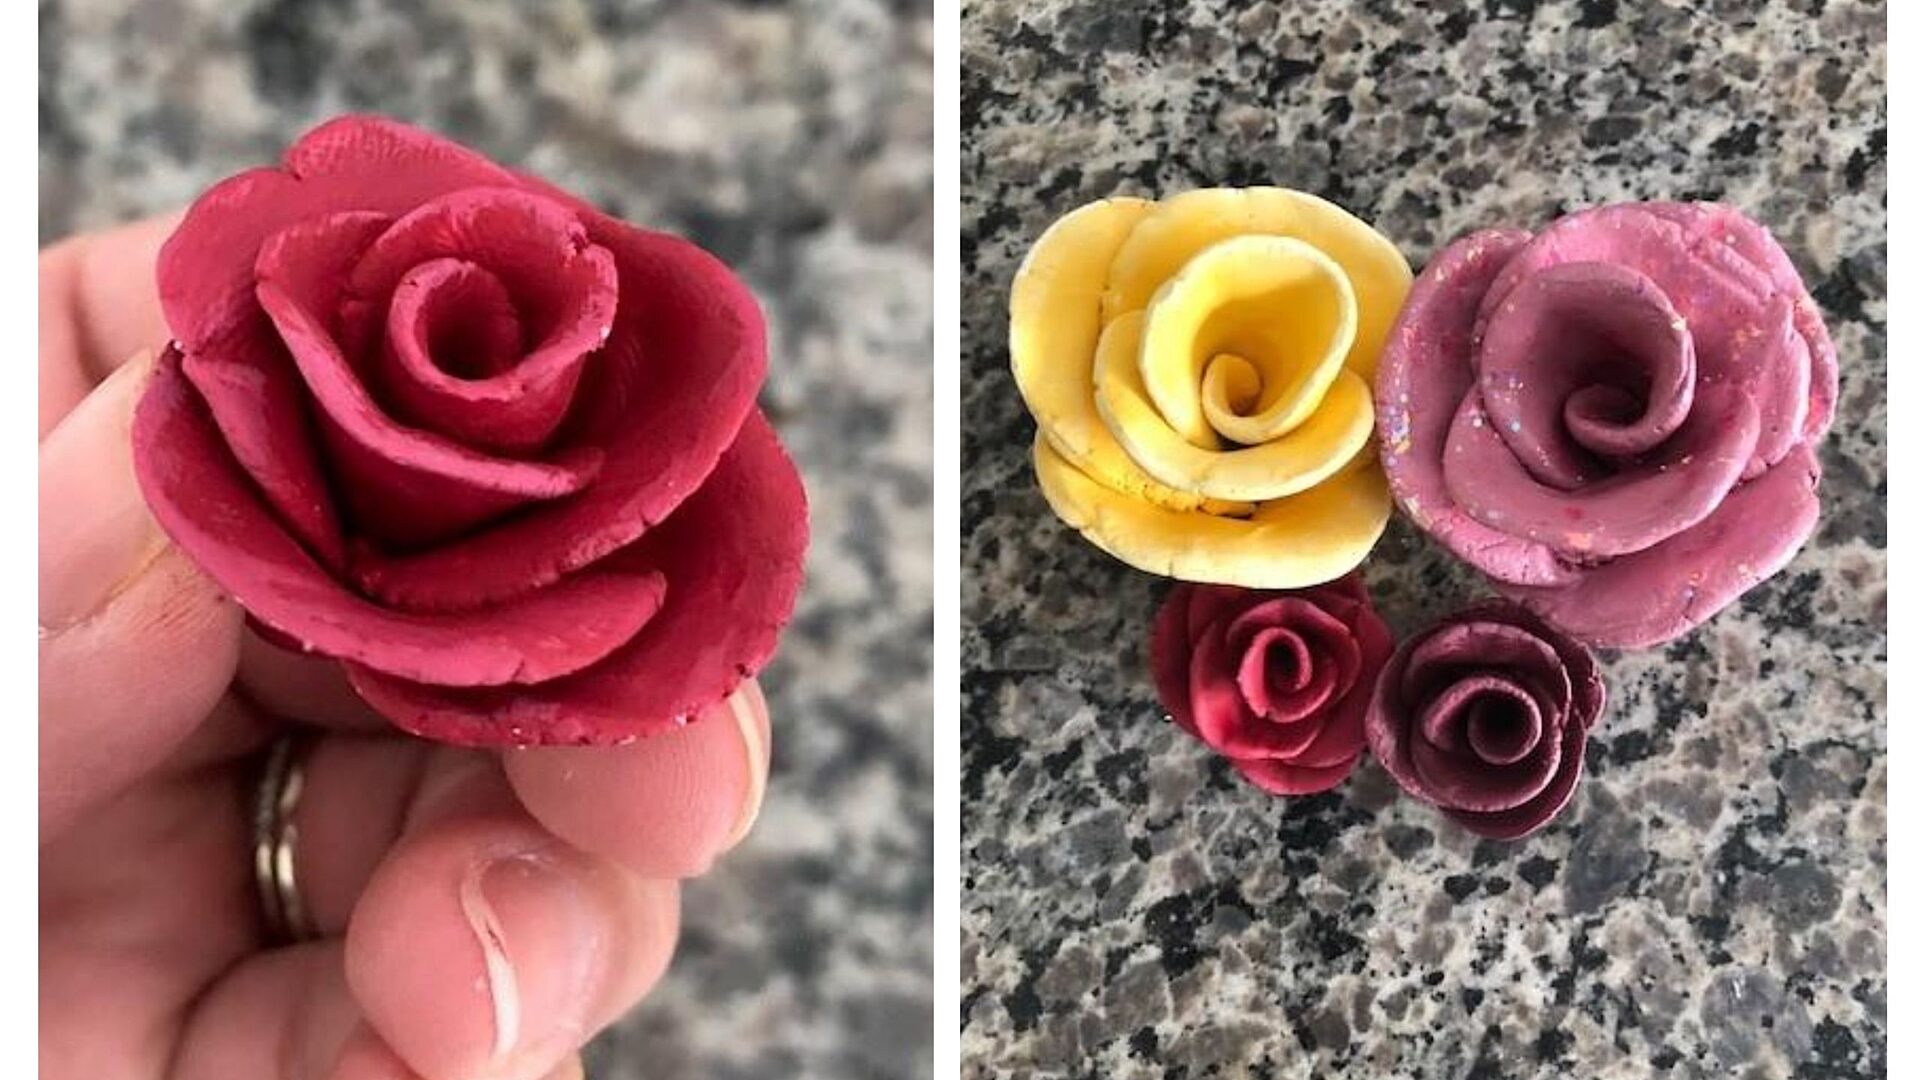
Step seven: Since the clay can air dry, leave it out overnight on a paper plate. By morning, they will be ready to paint!

Step eight: Use the acrylic paints you chose, and paint your roses!
The mission of UF Health Jacksonville Arts in Medicine is to expedite the healing process by facilitating transformative, educational and rejuvenating interdisciplinary arts programs as positive distraction outlets for patients, their families and professional caregivers. Find more resources and activity ideas by following the UF Health Jacksonville Arts in Medicine Facebook page.
About the author
